
After a month of living in Seoul, I decided to finally get my alien registration card. This is mandatory for any foreigner planning to live in Korea for longer than 90 days. I looked on the internet for resources, but felt most of the resources were very incomplete and I thought I would make a more comprehensive resource for anyone in my position. This write-up pertains specifically to my own experience as an H1 visa holder, but most of the requirements are the same.
Directions:
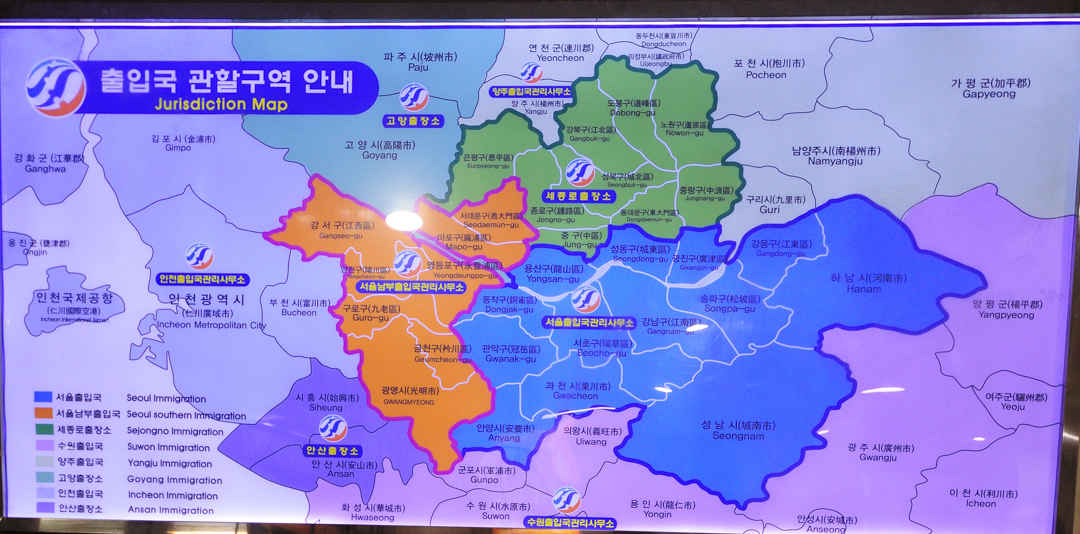
They have a jurisdiction map (below), but I think you can go to any immigration office that is convenient, as I went to the office in orange (Omokkyo: 오목교) despite living in the blue district.
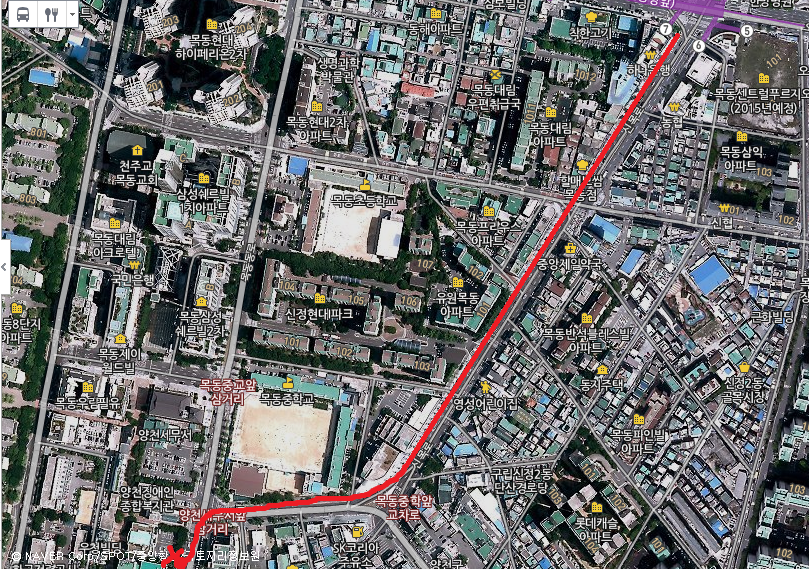
Simply get off Omokkyo Station (오목교역) and head straight out of exit 7. Continue to walk straight and follow the bend. Eventually you’ll come across a T intersection and it’s just on your left across the street.

Required Documents (Preparation)
First, you need to download an application, which can be downloaded here (Can also take a copy at the office, but I wanted to save time). Simply fill out the form. You will need a passport-sized photo as indicated on the form, along with your passport, a photocopy of the main page with your ID, and a photocopy of the visa. You can also check the page I linked earlier for the additional documents required to apply for the card according to your visa. H1 holders need a travel plan.
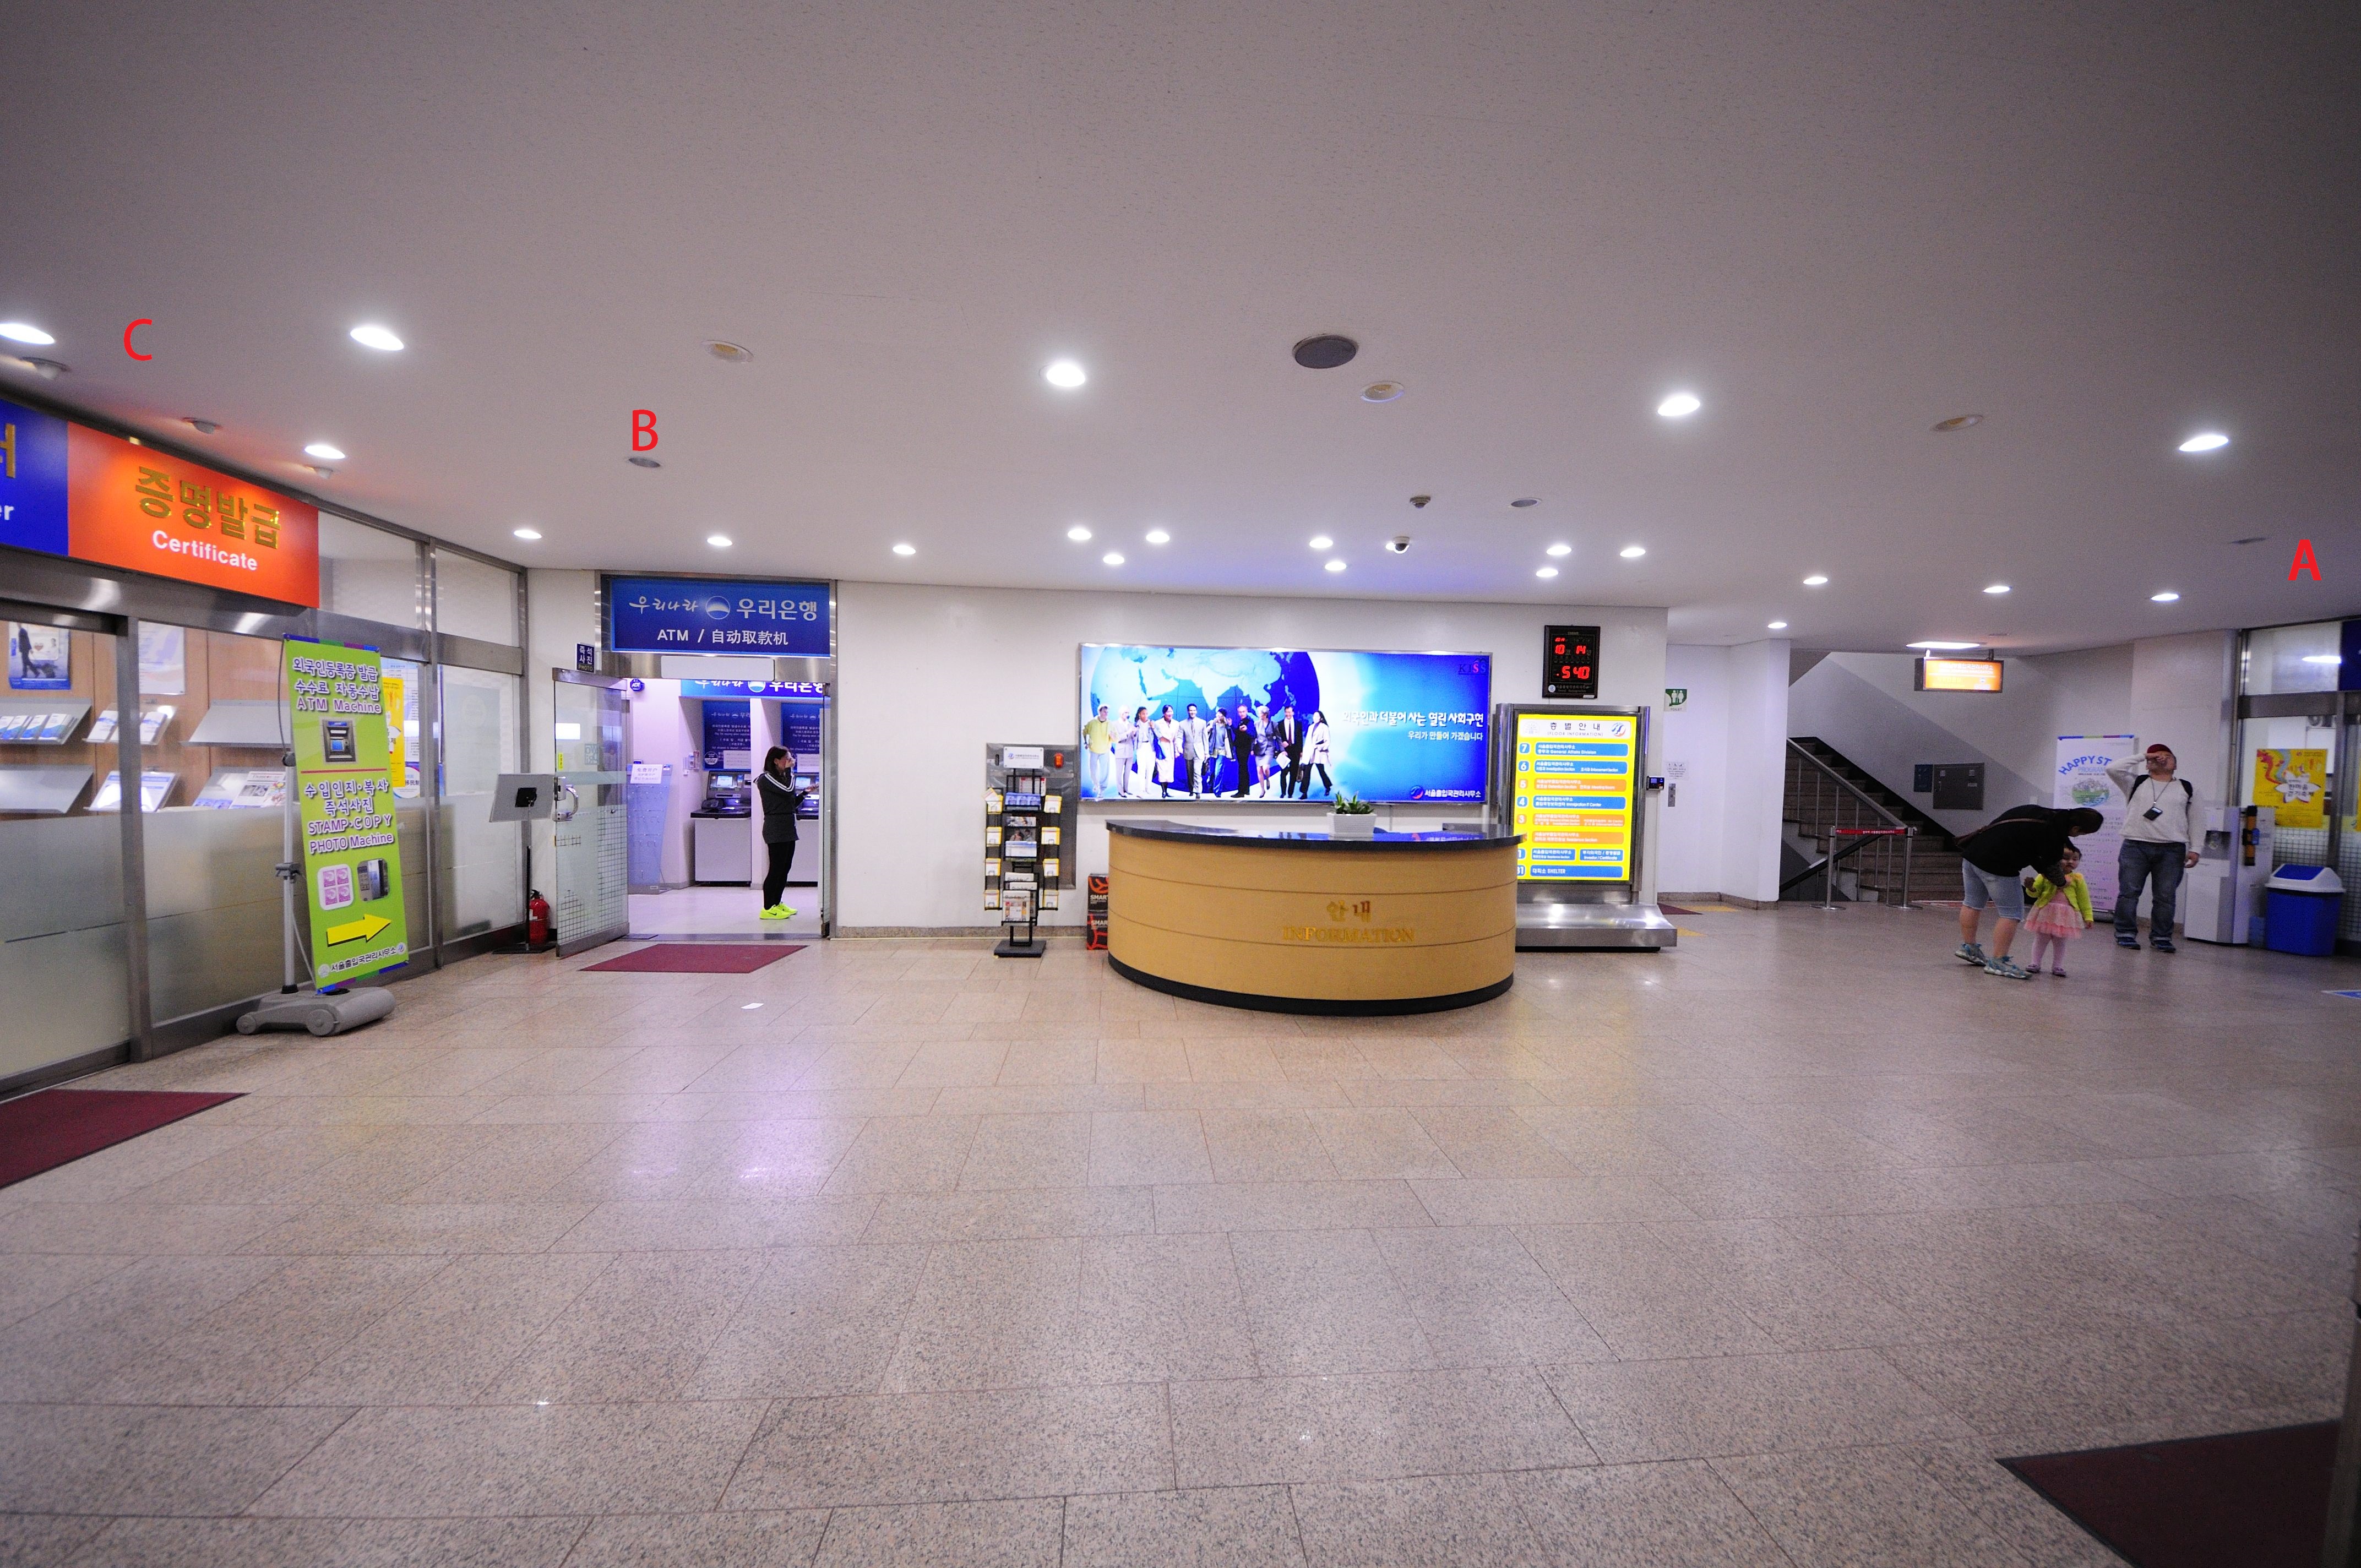
If you forgot any of your materials don’t worry too much. They will paste your passport-sized photo on your application if you were to cheap to buy your own glue. They can make photocopies of your passport and visa for 300 won, and they also have a photo booth to take your passport-sized pic in room B (diagram below). There’s a computer in room C for you to retrieve miscellaneous scanned documents you luckily send to yourself by email, such as that travel plan you may have forgot. I apparently was 3/4 on this missing items list. They pretty much don’t want you making one extra trip as much as you don’t want to make one extra trip.
What to Do
Once you enter the building, you want to enter room A on the right. Go to the digital kiosk in the middle of the room and click on the reason for your visit. Click on the first option. The kiosk will print a ticket for you and you’ll play the waiting game until your number is called out where you’ll face a government worker with varying levels of apathy toward your application (She was helpful for the most part though). The workers have varying levels of English, but if you pray and speak in simple terms, you should be fine. By that time, they’ll ask you to pay the fee which you have to do through their ATM machine in room B and show them the receipt. I don’t recommend paying the fee before you get in line because I found conflicting information and the actual fee turned out to be 3 times more than what I was expecting it to be. In my case I paid 30,000 won and I had the option of paying an extra 3000 won for delivery.


Once you’ve paid the fee, the worker will green light you and direct you to the desk all the way on the right to have your finger prints taken. You then have to wait two weeks, and by then you simply grab a ticket for pickup at the kiosk and you finally have your awesome little foreigner registration card you can use in place of your passport (for most things)!

Ryan -thank you so much for this useful and clearly laid out guide! As you said, it is very hard to find accurate and reliable information on this topic, but after reading your post (and especially seeing the pictures!) I feel much less nervous. So thanks! 🙂
I do have a question though: Do you know how the travel plan is supposed to look like? When I applied for the visa, it had to be at least 3 pages long, including every possible detail. Does it have to be this explicit when applying for the Alien Registration card?
I do realize that you applied almost a year ago, but maybe you can still help me with this. 🙂
LikeLiked by 1 person
Hello, just use the travel plan you used for your visa and you should be fine! Mine was only a page long!
LikeLiked by 1 person